

Print Setup
There are many ways to set up your image for printing. Standard size prints are efficient; easy to frame, package, ship, etc. But maybe you rather set the print up to prioritize your image’s unique dimensions, and thats fine too. In general, I recommend trying to stick to a standard size if you can. Here are some common setup options:
(if your image has more “extreme” dimensions, you may be better off looking into placing a custom order)
Q. Borders: Should I add them?
A1. Borders can help frame your image into a standard size print, especially if the image is not a standard size or is a different dimension ratio.
A2. Adding a small 1/8” border can also allow a little room for matting when framing the print.
A3. Adding chunky borders is an aesthetic choice. In some cases, it just looks good.
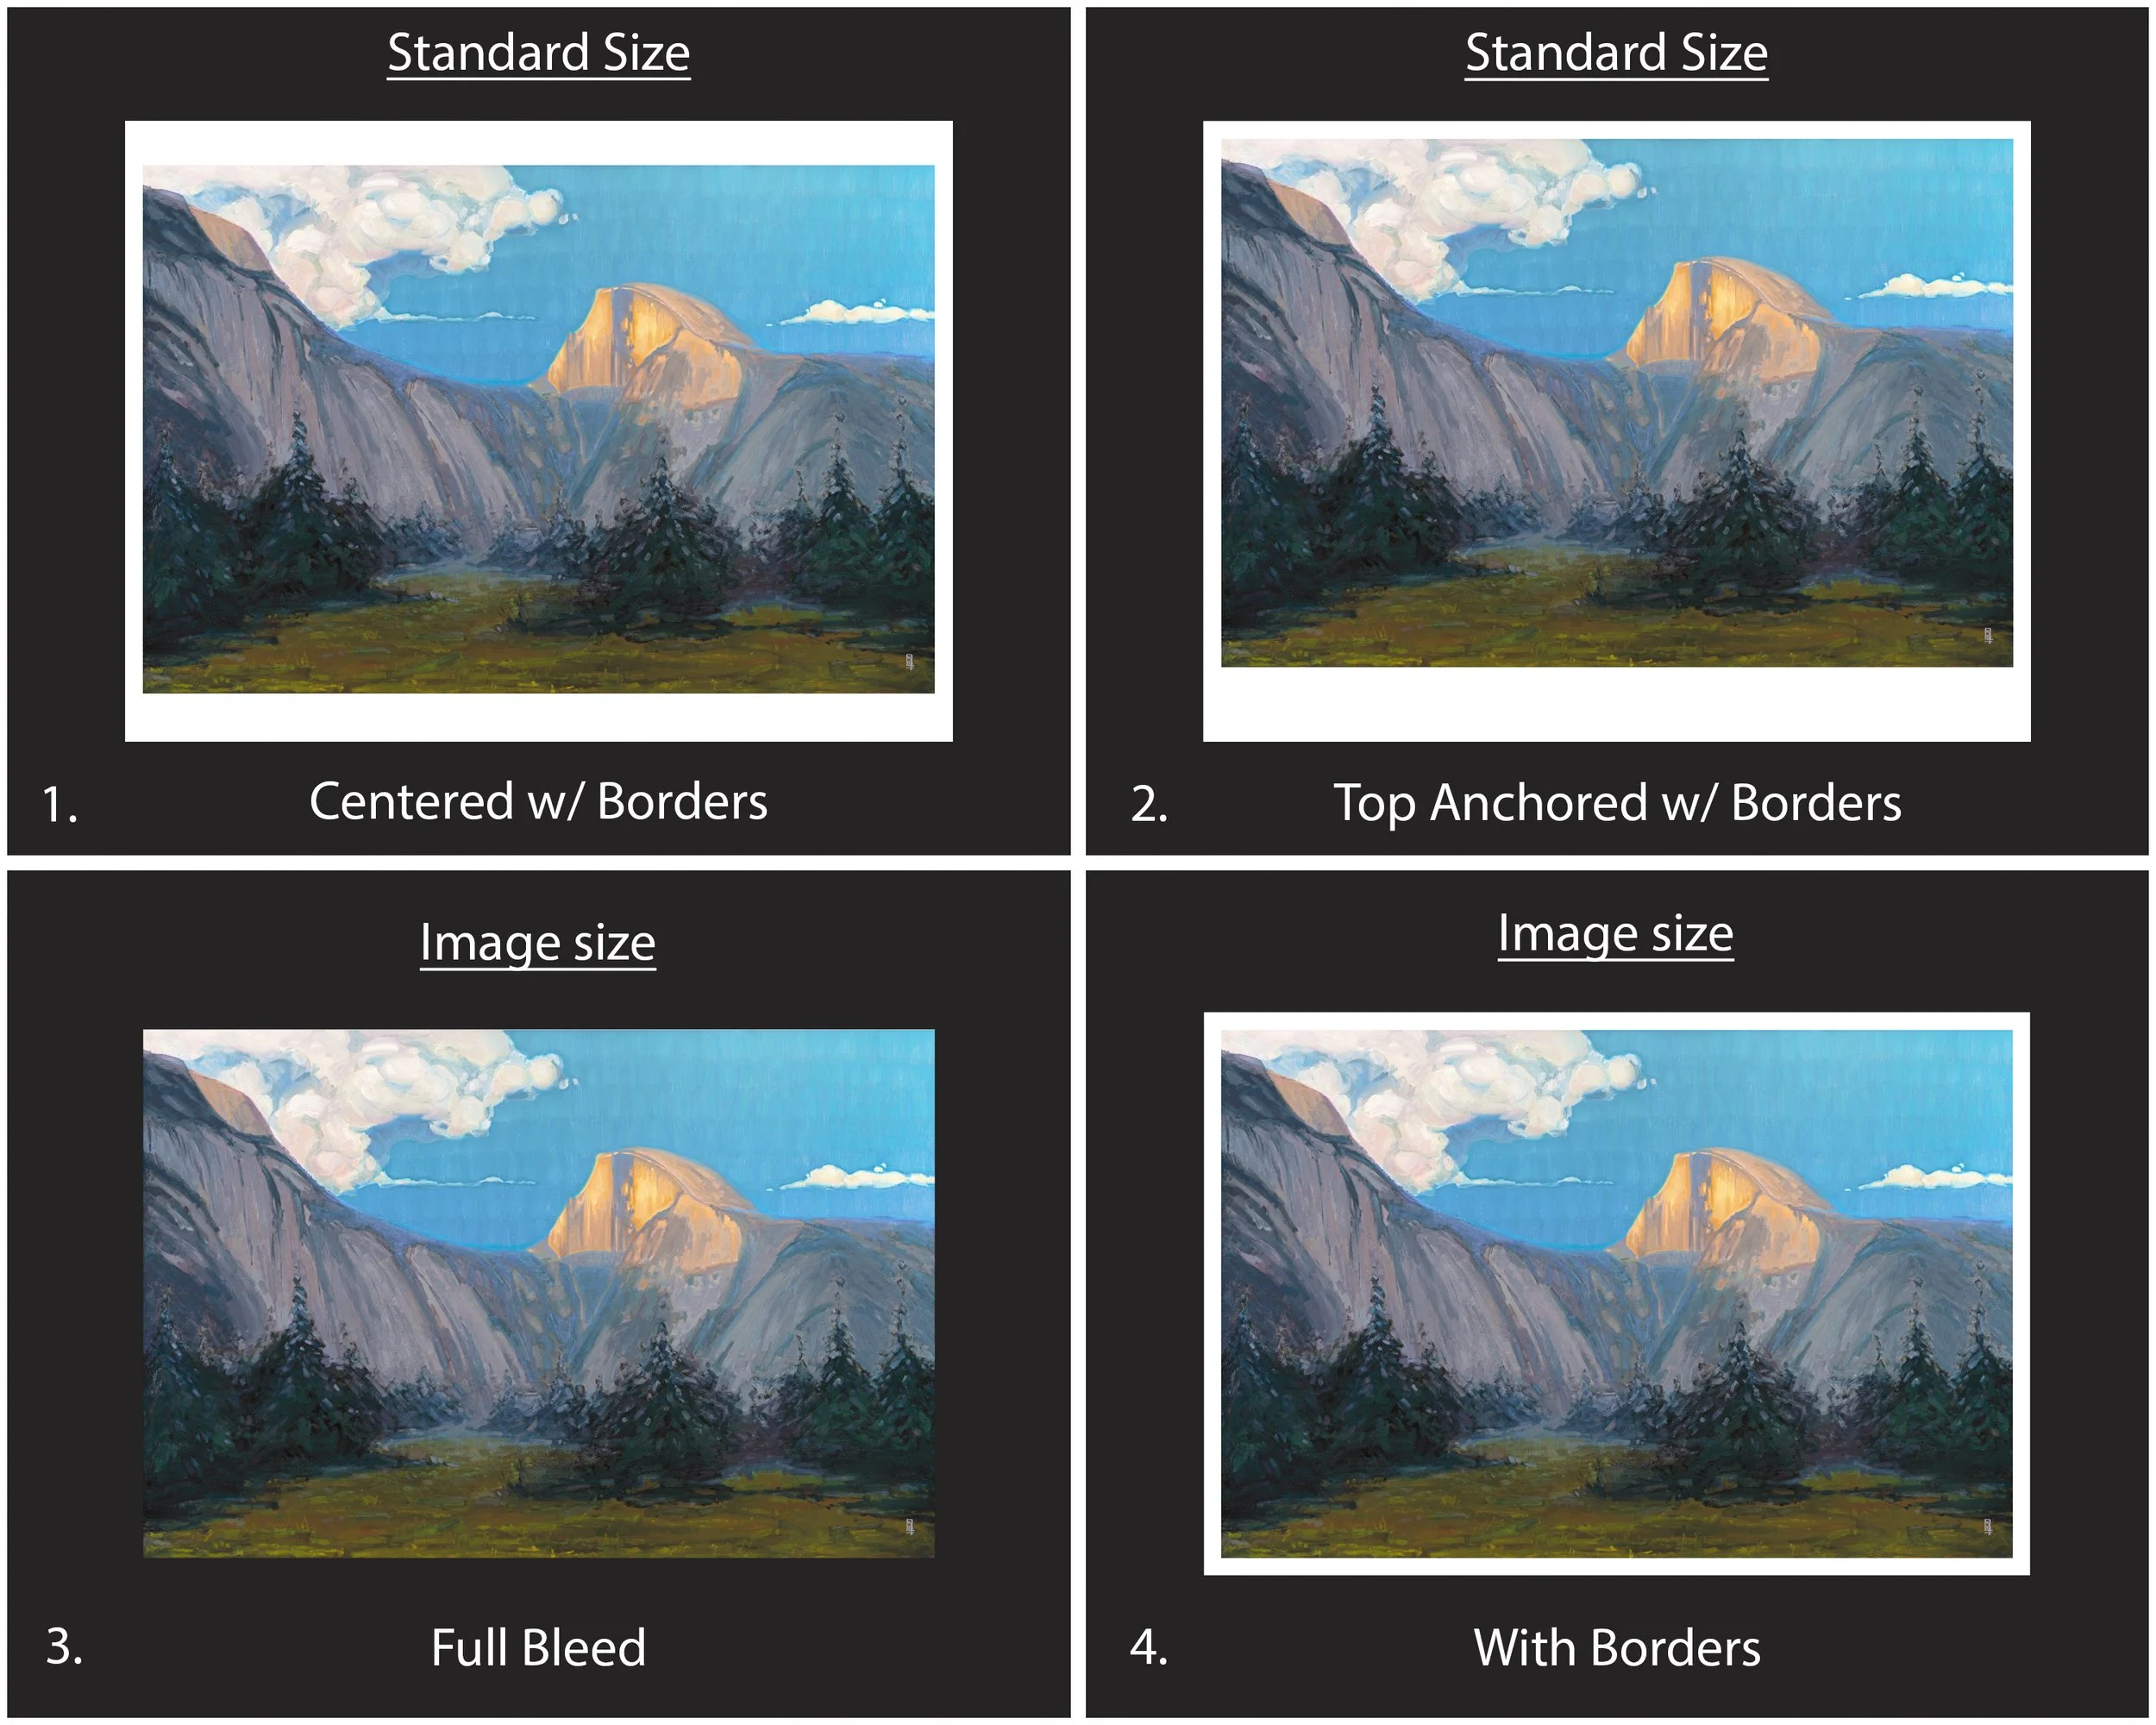
1. Standard Size - Centered: Your image will be scaled to fit the selected standard size, with or without borders (borders can help center the image and also look good). Overall print size will be the standard size you selected.
2. Standard Size - Top Anchored: Like the above option, your image will be scaled to fit the selected standard size. And if the image allows, it will be anchored to the top and sides, allowing more space on the bottom. This is useful for artists that want to use the space for signing, numbering, stamping…
3. Image Size - Full Bleed: No borders. Your image will be scaled to fit within the size you select for purchase. Then cropped to the images edge. Final print size can vary depending on your image dimensions.
4. Image Size - Borders: Your image will be scaled to fit within the size you selected, while accommodating for borders. Final print size may vary depending on your image dimensions, but will fit within the size you select for purchase.
* Remember, adding borders does not add to the overall print size. Your image will shrink to accommodate the borders within the print size that you select.


Here are some examples of anchoring the print to the top and sides to use the space below for signing and stamping.